Transfer hours between projects or jobs
Use Transfer Hours to correct timesheets that were recorded against the wrong project or job. The transfer moves each selected timesheet entry in full to one destination; it does not copy the hours or split an entry between destinations.
Before you start
- You need access to the Transfer Hours action. If the pencil icon is not available in the Time Sheets workspace, ask your administrator to confirm that your profile has the
TransferWriterole. - Check the dates, users and destination before saving. A transfer changes the selected entries' project or job.
- The destination must be valid for the whole period of the selected timesheets. For example, if the selected entries run from 3 to 7 June, the destination project's or job's start date must be on or before 3 June and its end date must be on or after 7 June.
Transfer the hours
- Open the source Project or Job, then open its Time Sheets workspace.
- Filter the grid to the timesheets you need to move. Filter by Date and User as needed.
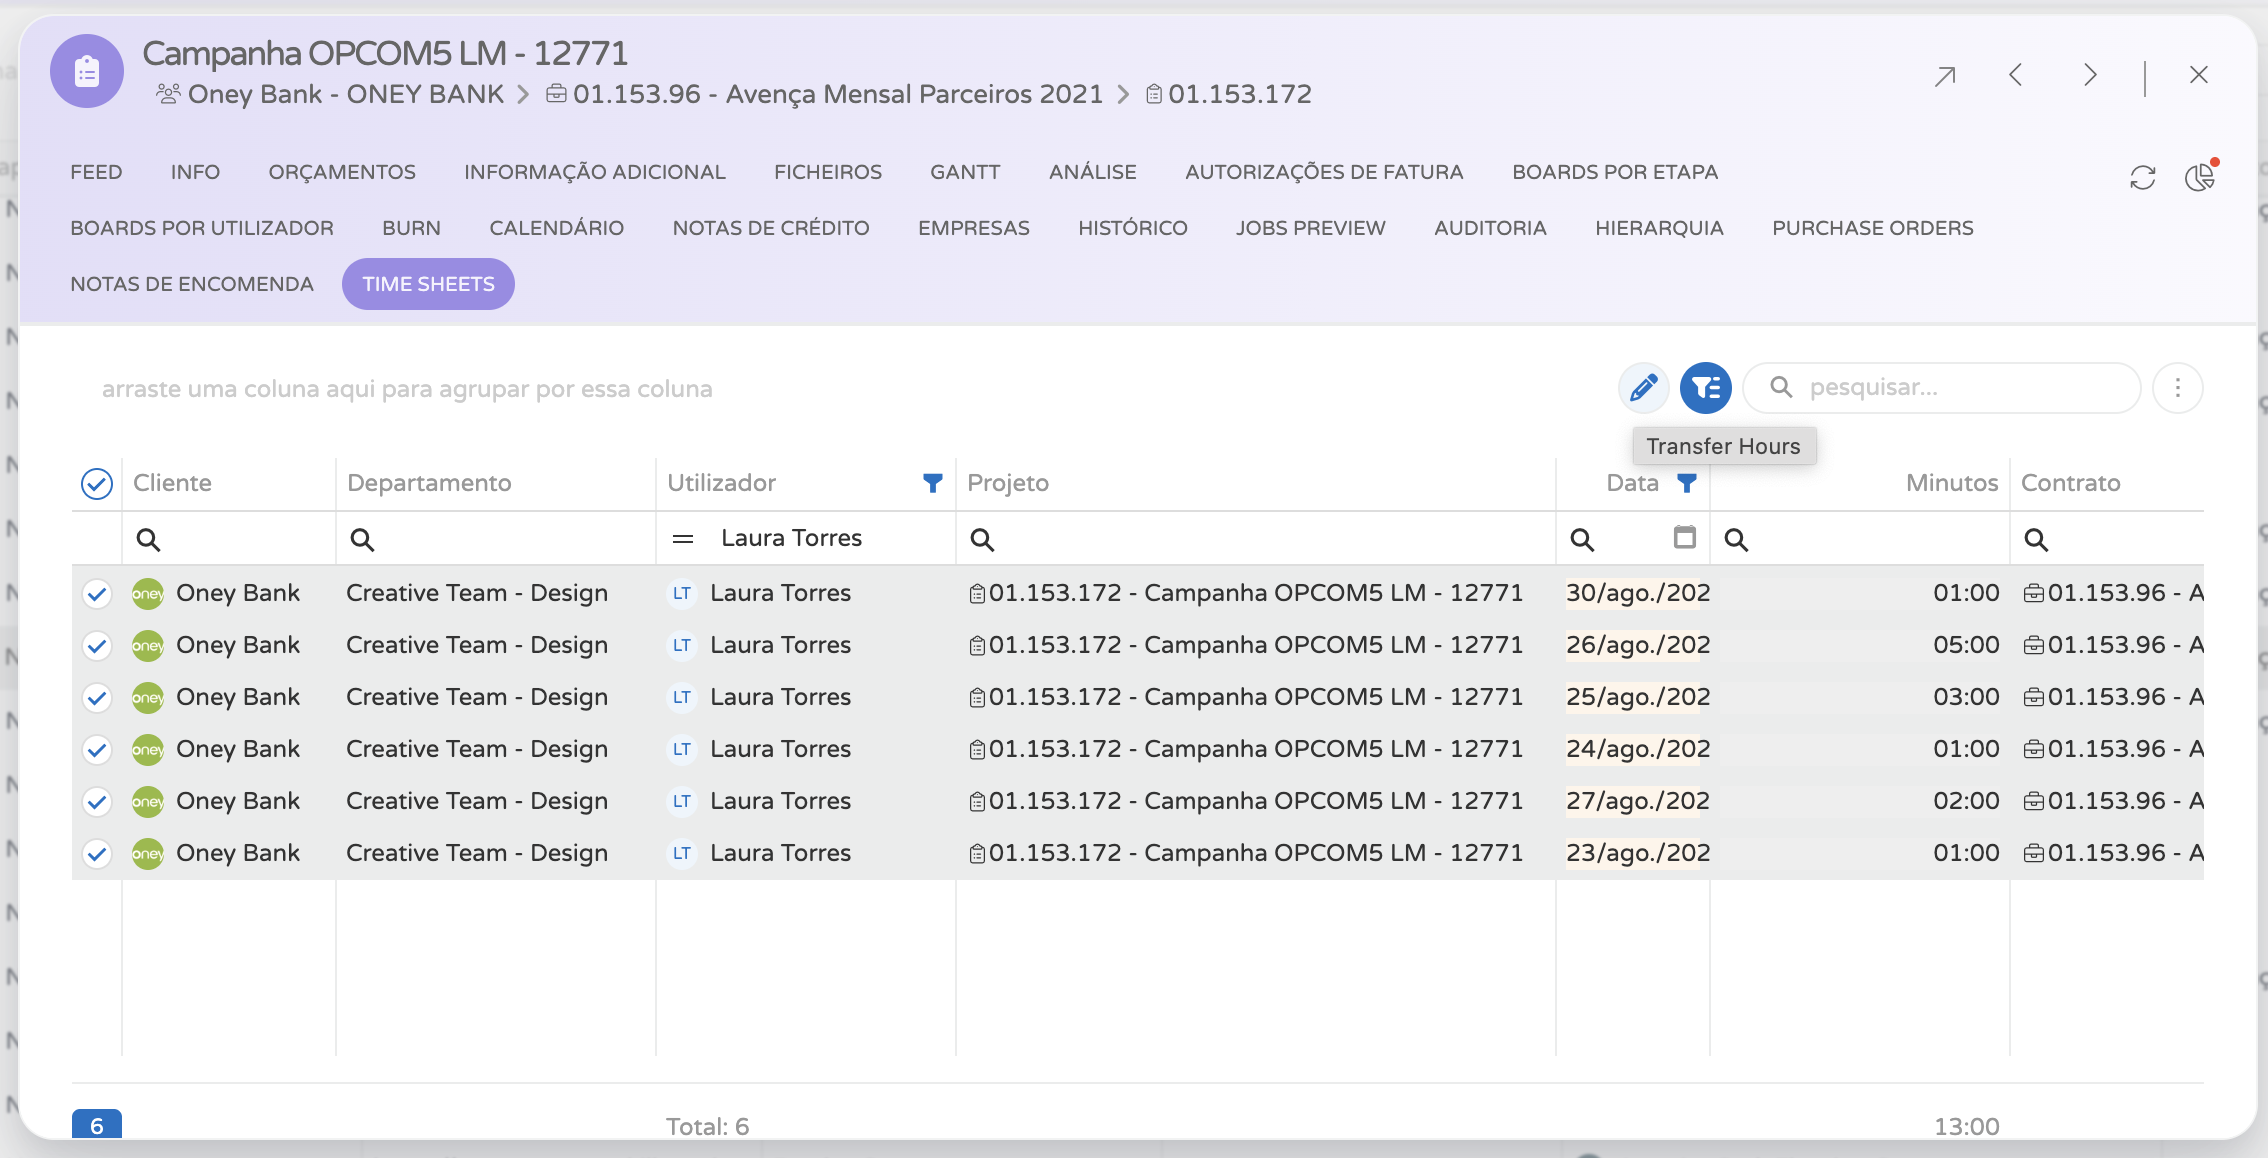
- Select the relevant timesheet rows.
- Select the pencil icon, Transfer Hours.
- In the popup, search for and select one destination. You can select either a Project or a Job. The results show the company, client, fee, project, job, and start and end dates to help you confirm the destination.
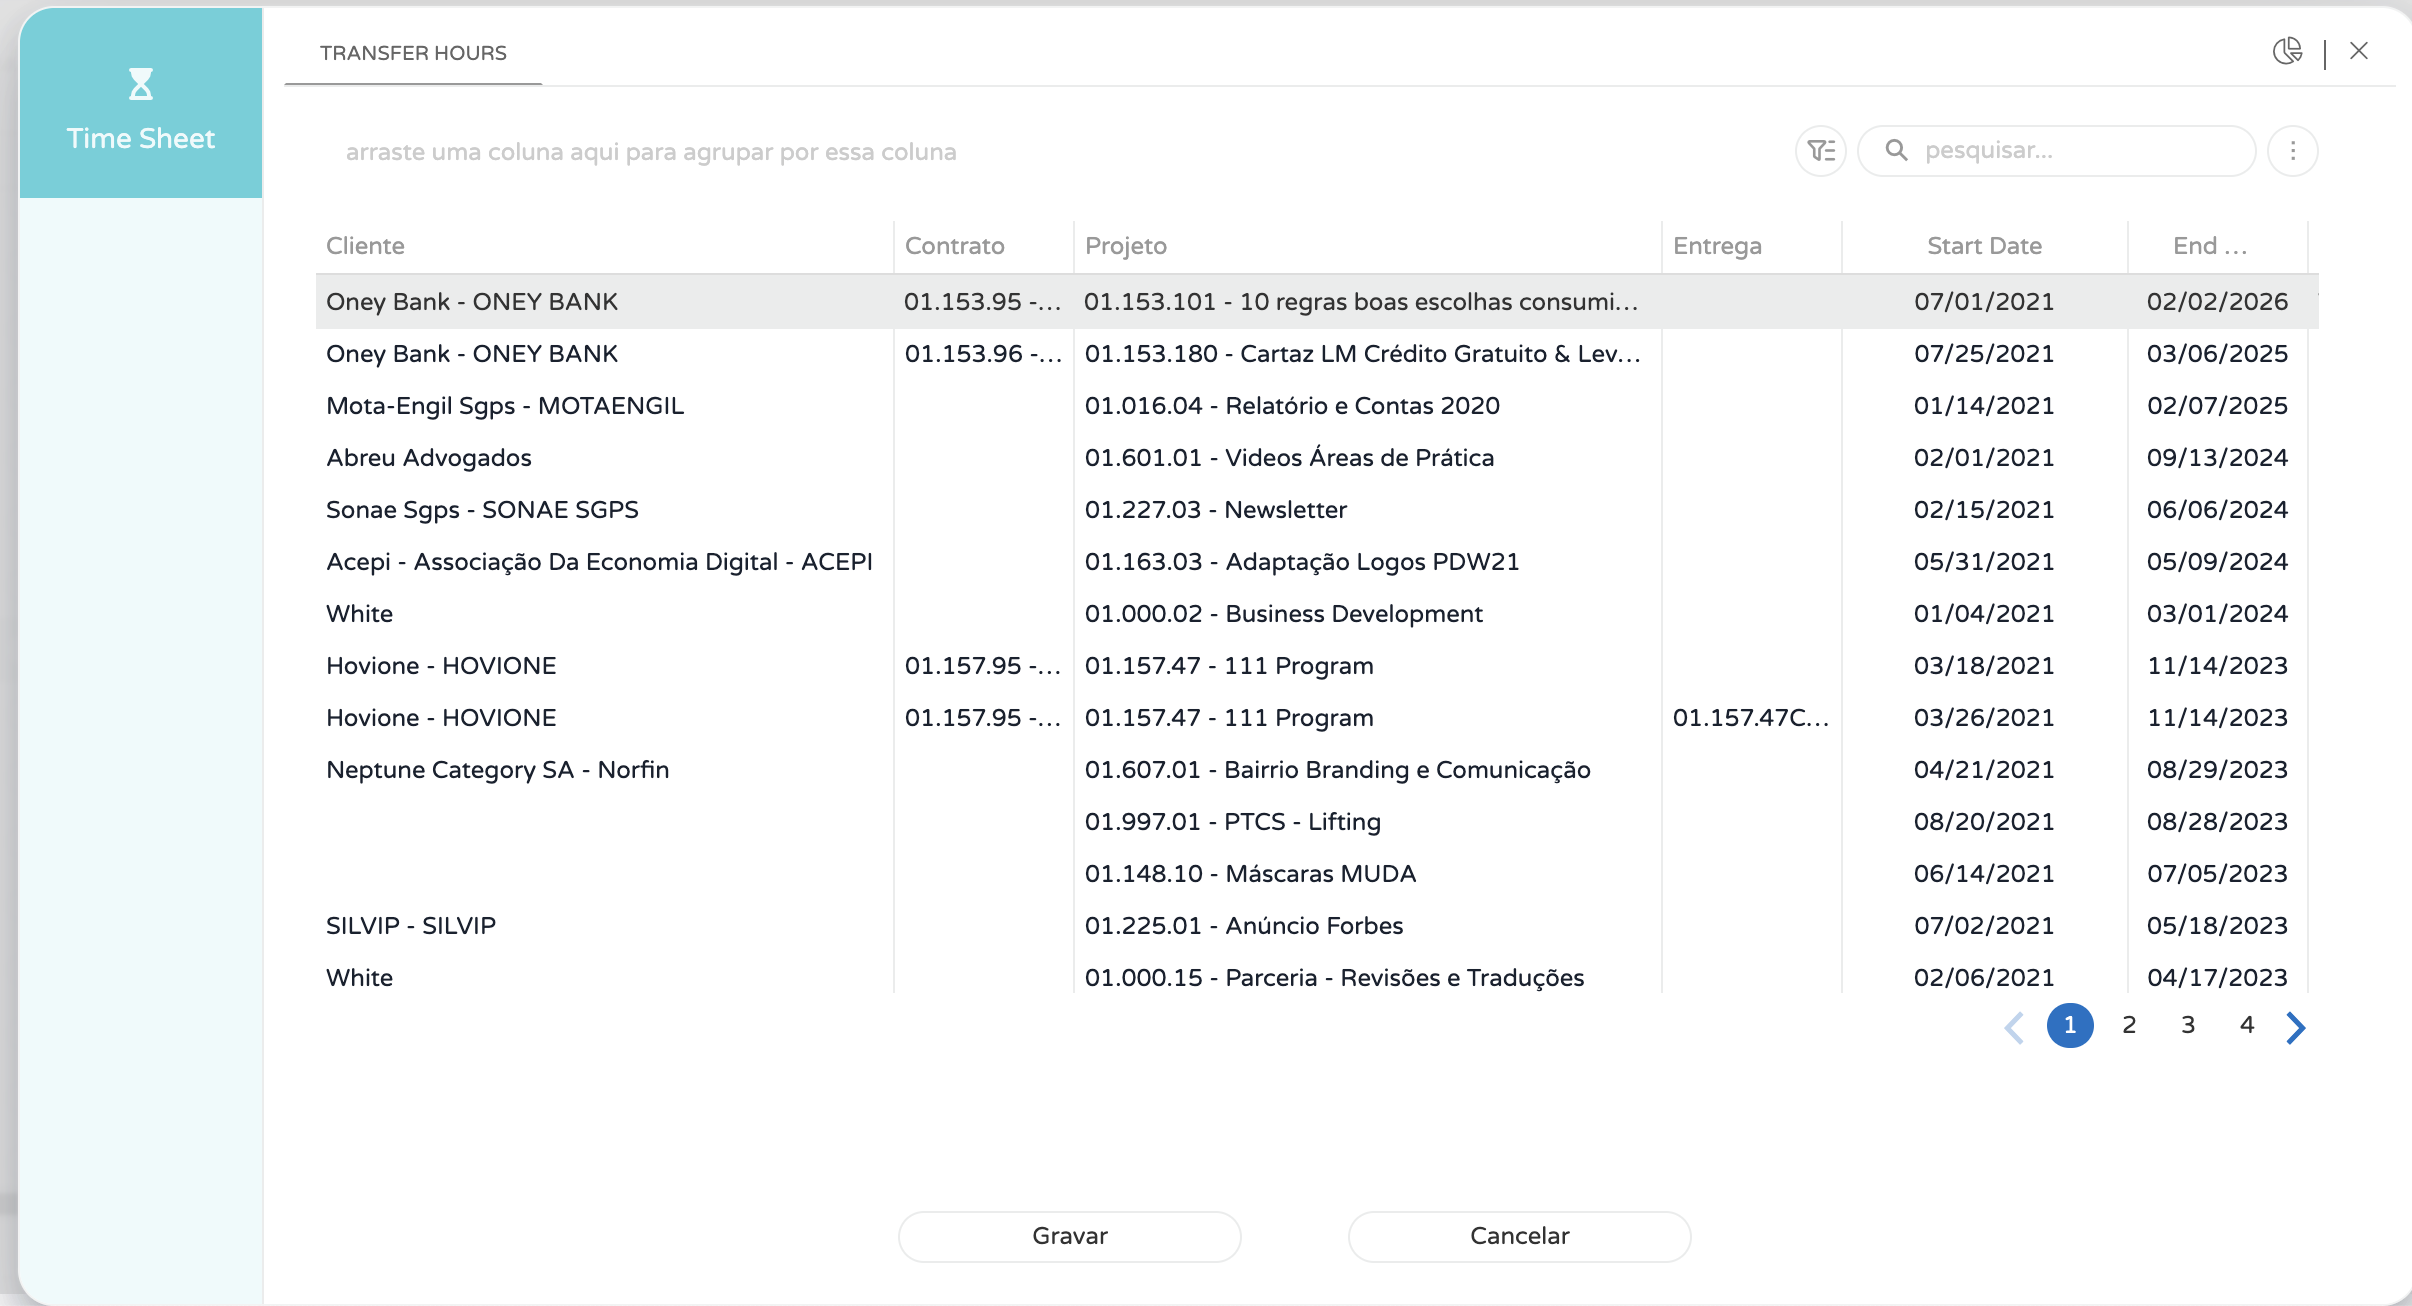
- Select Save.
The Time Sheets grid refreshes when the popup closes. Confirm that the selected entries now show the intended project or job.
When transferring more than one timesheet, select entries that share the intended destination and whose full date range is covered by that destination. Run separate transfers when the entries need different destinations or date ranges.
Why a destination may not appear
The transfer popup only returns eligible destinations whose period covers the earliest and latest date among the timesheets you selected. If you cannot find a project or job, check its start and end dates first, then reduce the selected date range or choose a destination that covers it.